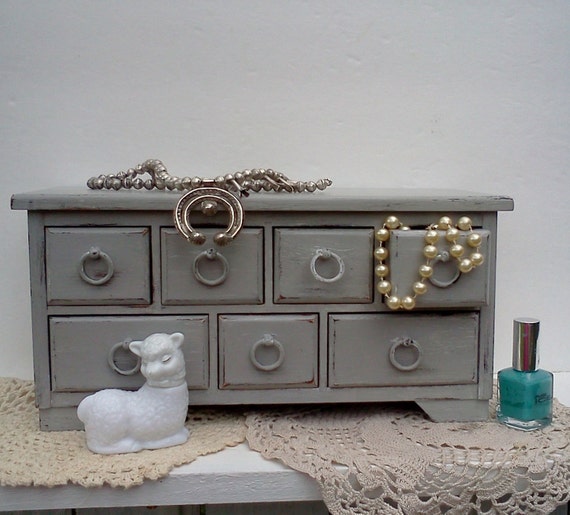
Putting the final touches on any project is usually the most fun.
Today I am waxing, polishing and cleaning the jewlery box started yesterday.
Step 3. Applying wax.
 |
| applying the wax |
With a soft rag apply one thin coat of wax to the wood surface. If the item you are waxing has glass or mirrors on it tape them off so you don't get wax on the glass. It is hard to remove. I like to use beeswax like this product. link There are many places on the internet where you can buy beeswax. My niece is raising bees and I wonder what she will do with the left over combs after she extracts that deliscious honey!
 |
| Olver Honey Combs yummm |
Of course you can also use a manufactured furniture wax like Minwax Paste wax link
Once the wax is applied allow it to dry for a minimum of 10 mins.
 |
| polishing with a soft hand towel |
Polishing... with another soft cloth begin polishing after the wax has dried. This just takes elbow greese. Lots of elbow greese! I like to go in one direction and really rub hard until I get a luster going on. If wax is caked into any little tight spots I use an old soft toothbrush to get at it. The wood is going to start feeling like a smooth beach stone. Wax dries to a hard durable finish.
Step 4.
Cleaning the inside compartments of the jewelry box. My method is to knock out what ever I can. Then I use 2" wide tape do get the job done. Wads and wads of tape. I stick it on and press it down firmly. I use the pointy end of an old paint brush to get the tape into little corners and seams. Voila when you pull the tape off the dirt and most of the grime comes with it. This takes awhile when there are lots of little drawers. It is worth taking the time to do it right.
 |
| tape pulling out the grime |
As you can see this drawer was pretty dirty. The red velveteen fabric had a lot of dust and grime on it.
 |
| dust in all the corners using a stick to get it pressed into all the crannies... |
The sides and corners were full of dust and lint. It took alot of tape to get all that up. A small stained area remained after the dust and grime was pulled away.
 |
| cleaning with stain remover |
A paper towel with some stain remover will get that stain out. I have used this stain remover on all colors of velveteen linings and never had a mishap with it. I have sprayed it directly onto the interior of the box as well as a little on the paper towel.
 |
| looking new and clean |
I just dab away at it until it comes clean and look what a great job it did. It looks new. This is also a time when you can glue down any loose lining. If the lining is so badly damaged that you cannot get it clean pull it out. You can always reline it with fabric or paper.
Once my jewelry box is painted, polished and cleaned I like to set it in the sunshine for several hours. Sunshine really cleans. It removes any lingering odors and does wonders to freshen up your project. Good old Mr Sunshine.
 |
| Seven clean drawers in the sun! |
I love the way this turned out. The Paris Gray paint is so rich and pretty. It is just the way I imagine Paris to be on a foggy spring night when the street lights come on. Romantic ...Well a girl can dream...
 |
ready for jewels!
 |
available in my Etsy Shop here:
link
Enjoy some Shabby Chic !
weelambie/Anne


1 comment:
Beautiful jewelry box! Wonderful post!
Post a Comment